TWiki . Mill0405 . AssignmentsSS05

Introduction | Schedule | Assignments | Readings | Participants | Download | Millcam | Links


f1.jpg
DWA Final Assignment - FLOWchannel

Final Presentation
The final presentation (not a critique session) will take place in the ASL-RedHell, Friday July 29 at 14:00

The presentations should be short and should cover the following:
- Your intentions for the piece
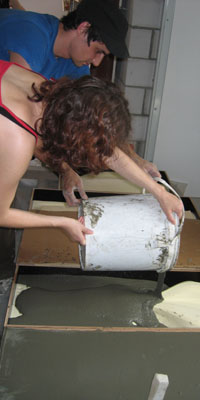
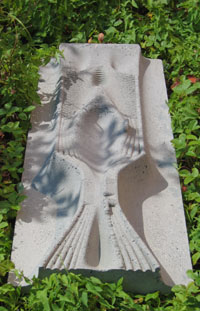
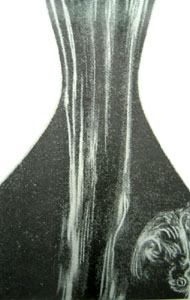
- How you fabricated and textured the piece to affect the flow dynamic
- Any issues of connection from the piece before and the piece after yours
- A conclusion statement.

The presentations will occur in the order of the pieces:
1. Michi
2. Stephan
3. Jenny
4. Sylvan
5. Till
6. Lukas
7. Roman
8. Katrin
9. Sabine
10. Mirjam

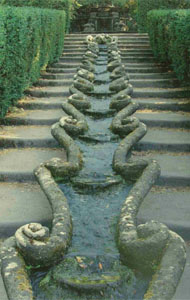
After the final presentation we will go outside to the installation, and turn on the water.
This will follow with discussions and critique of the pieces under the real flow conditions.

Once the discussions are over there will be a small apero.


Finishing up:

Wednesday
- posting all images onto the server,
- downloading the video to digital files,
- posting the final MAYA surfaces to the server
- work on final presentations

Thursday:
- construction of installation set-up
- construction of sluice box
- final preparation of presentations

- Retrieval trip to Chur for piece pickup.

- De-forming the pieces and piece touchup.

- Installation setup tests
- Testing of sluice box
- Testing of waterflow

Friday:
- setup and installation of FLOWchannel on-site in front of the HIL building.
- Preparation for presentations
- Presentations begin at 14:00


Final Deliverables:
- Complete documentation in the form of a CD case sized booklet, with text, pictures, and credits.
- Complete DATA CD of all work done in the course:
- projects, scripts, MB, MEL, animations, SurfCAM, presentations, images, and any other media.
NOTE: the CD must be well organized for ease of finding data.

f2.jpg
f3.jpg
------

dwa1.jpg
DWA Final Assignment - FLOWchannel

The final project for the diplomwhalfacharbeit is to assemble the skills and knowledge to this point and cast a flow channel.


For this assignment the individuals in the course will need to work as a project team, with each person responsible for an inclusive role in the team work, as well as for an individual portion of the project design, fabrication, and installation.

The project is to create a FLOWchannel, as an experimental installation, and example for potential follow on work. The FLOWchannel will be fabricated by casting concrete blocks around milled foam blocks to create the individual components of the courseway. The FLOWchannel will represent a series of building blocks, allowing for the individual design of a FLOWsurface, while bringing together the elements at the end to create a specific, and unified installation.

The FLOWchannel will be 10m long, 38cm wide, and will consist of 10 individually cast concrete elements. There will be a gravity-slope for the flow of water, and drainage at the end. The project will be installed at the ETH Hoenggerberg, with the exact location yet to be determined and approved.


Work Methodology:

1: Analysis
- Collect all of the images and video of your piece from the last experiment.
- Compile the video into presentation format. (400x600px)
- Compare the digital analysis to the actual resultants.
- Analyse the images and video and isolate one or two specific "FLOWdynamics". These will be the basic building blocks for your individual work.

2. Implementation
- The team will be given the basic data for the construction, as well as the casting boxes.
- The ends of each section will be predefined so as to ensure the path flows directly from one section to the next smoothly.
- The path between the end-sections is subject to the design interpretation of the individual.
- The size of the blocks has specifically been chosen to promote further testing if required.

3. Design
- Each participant is responsible for the design of one section.
- Participants may work in groups so as to distribute their "FLOWdynamics" to numerous different pieces along the "FLOWchannel"
- Care should be taken to remember that this will be a "NEGATIVE CASTING" of the milled form, and therefore all the surface texturing will be INVERTED!
- Each surface may be made up of component parts, it is NOT required that each block has a unified surface.
- Each block will have flat-square ends, so as to ensure a flat connection to the next block.

4. Fabrication
- Each student will be given the raw material to assemble a casting box.
- The casting boxes will be 12cm deep, within which the milled form will be inserted, reinforcing mesh will be added, and then concrete cast into the box.
- Casting and curing should take ~3 days.
- There will be a demonstration and more information on the casting process.


Schedule:
Analysis - July 19, 20
Design & Fabrication- July 21- 25
Concrete casting Tuesday July 26
Installation July 28,29(am)
The final review will take place Friday July 29th at 14:00


dwa2.jpg
dwa3.jpg
------
  Diplomwahlfacharbiet - Assignment 2 - Channel Surface

The first assignment has set up a number of conditions for FLOW DYNAMICS.

In each case the resulting pattern is a resultant of a fluid flow and the manipulation of a static geometry. This approach to the creation of the FLOW DYNAMIC isolates a single dynamic within a LAMINAR stream.

For the next assignment we are going to increase the level of complexity in 3 ways.
1. Combine different FLOW DYNAMICS so as so increase the complexity of the FLOW
2. Change the scales and rhythms of FLOW DYNAMICS to create different scales of FLOW
3. Use surface texturing to manipulate the FLOW DYNAMICS in terms of speed, friction, turbulence, and scale.


For this assignment you will be required to develop a FLOW DYNAMICS surface to be tested in the Hydrodynamics Channel. The piece is to be modeled in MAYA, milled using Regisol foam, and then installed into the channel for testing.


The design should be based on the learning acquired in the first assignment of the DWA.
The design of all of the channel piece will have a common starting and ending profile.
This profile ensures that all of the blocks can be added linearly to create a longer channel bed.


The block will be 38cm x 1000cm x 10 cm
The starting and ending profiles for the block are given, and are located on the server as:
deepspace/00_Daten_SS05/CHANNEL/c-template.mb
The sides of the block must be maintained at 5cm on either side so as to allow for proper weighting of the material in the hydrodynamics channel.


This assignment is due July 18, 10:00 in the HIF building by the hydrodynamics channel.

The following assignment will build upon this one..


Eddy1.jpg
Diplomwahlfacharbeit - Start Up : FLOW-EXPERIMENT

To start the FLOW Diplomwahlfacharbiet, there will be a fast primer assignment.
The goal of this assignment is to get us back to working in Maya, with the mill, and thinking about the concepts of FLOW.


This assignment asks you to identify, examine, and generate a specific "pictoral" version of a FLOW dynamic.

For this assignment you are asked to identify a specific FLOW DYNAMIC by finding 3 images that depict the same physical force reaction couple, in different mediums, different scales, or different environments.
Then you are required to EXAMINE and MODEL the dynamic using MAYA
Then you should apply dynamics to the modelled object to TEST and REFINE your model.


The basic workflow should look something like this:
1. Identify your FLOW DYNAMIC SITUATION in 3 different images
2. Determine the forces and logic of the FLOW DYNAMIC
3. Determine what forces and geometry are at play
4. Model your interpretation of the geometry in MAYA
5. Apply DYNAMICs either through the use of particles or fluids using MAYA ANimations
6. Test the model using the dynamics undere different conditions and intensities of FLOW
7. Compare the final animation with the images from step 1.
8. Preapare a short presentation of 4 powerpoint slides / images / panels, and prepare the animation for presentation


This assignment is due July 13 at 14:00. The following assignment will build upon this one..

FS-ZED.jpg
ems_mixing.jpg
------

  Assignment 2a : Basic Architectural Programming

The goal of this assignment is to show the relation between simple parametric programming and architectural design..

On of the most tedious parts of being an architect is to produce the drawings for repetitive elements that are similar but not identical. Examples of this are staircase detailing, structural column layout, structural slab details, window details,… If an architect can “map” the logical relationships between each INSTANCE of an element and the position of the individual elements then the concept for the design can be programmed.

For this assignment you are asked to identify and create a simple SKETCH SITUATION in architecture, where the use of the computer and parametric programming will greatly assist in the ability to design and modify the situation.

The basic workflow should look something like this:
1. Identify your SKETCH SITUATION
2. Determine the logic of the spatial layout
3. Determine the average geometry of the INSTANCES
4. Program in MEL a simple looping structure that will create the layout
5. Determine the logic for changes in the INSTANCES
6. Modify your code so that the INSTANCES also change for each insertion
7. modify the overall code to include variables that allow for more repetition, greater size, or greater change in the INSTANCES.
8. Finally package the entire code as a PROCEDURE.


This assignment is due May 18, in class. The following assignment will build upon this one..


  Assignment 1c) Milling

The third part of assignment 1 is to mill your digital surface into a physical block of material.

For this third assignment there will be an additional step.
The participant should choose one of thier DETATCHED surfaces, and go back to MAYA and make changes to it.
The surface should be re-worked so that it has a significant aditional zonje of DETAIL added to the topology.
To do this the surface may be REBUILT and re-manipulated or there may be a new surface created. The surface should also be processed in SurfCAM and milled at a higher degree of detail.

1. Save the surfaces out of Maya according to the previous instructions.
2. Process the surfaces in SurfCAM:
- create a rough cut for all the surfaces together.
- create a series of fine cuts that use the different tooling parameters to create textures.
- create line cuts as desired (if set up in Maya).
3. Save the DSN file.
4. POST the G-code, and save it with an appropriate name.
5. Turn the mill & controller computer power on.
6. Find the PRECIX computer, and save your G-code files onto it.
7. Mill your surface.

The goal for this assignment is to start thinking about both the issues of representation of Geography, as well as the issues involoving differnt scales of detail. The assignment is set up to provide some additional skills that will be required for the milling of landscape models, however, the product at this stage should still remain abstract and experimental.

Good Milling!.


  Assignment 1b) SURFCAM: Processing a surface

The second assignment is to process one of your MAYA surfaces and get it ready for the CNC mill.


1. Choose a surface that doesn't have any UNDERCUTS

2. Subdivide the surface IN MAYA using the detach surfaces tool

2. Export the surface to surfCAM

3. Process the surface with both Rough and fine cuts.

3. Post and save the G-code


The goal for this assignment is to get familiar with SurfCAM? and preparing surface forms for output to the mill.

The final product of the assignment should be a set opf G-code files for the Precix 3 axis CNC mill.

The results from this assignment are DUE for the morning workshop on Nov 3, and are required to proceed on to the third part of the assignment.


  Assignment 1b) SURFCAM: Processing a surface

The second assignment is to process one of your MAYA surfaces and get it ready for the CNC mill.


1. Choose a surface that doesn't have any UNDERCUTS, size 500 x 300 x 50mm max

2. Subdivide the surface IN MAYA using the "detach surfaces" tool

3. Freez the transformation on the surface.

4. Export the surface to surfCAM using .iges export.

5. Process the surface with both Rough and fine cuts.

6. Post and save the G-code


The goal for this assignment is to get familiar with SurfCAM and preparing surface forms for output to the mill.

The final product of the assignment should be a set opf G-code files for the Precix 3 axis CNC mill.

The results from this assignment are DUE for the morning workshop on April 20th, and are required to proceed on to the third part of assignment 1.


primitive.jpg
Assignment 1a) Maya: Learn by Playing

The first assignment is to simply get on the MAYA software and try to make some surfaces.
There are 3 specific ways to create a NURBS surface:

1. Create > NURBS Primitives > Plane


2. Create a series of lines or splines, then use the "LOFT" tool to generate a surface


3. Create a set of parallel and connected lines (splines / rails) and use the "BI-RAIL" tool to generate a surface


The goal for this assignment is to get familiar with MAYA and creating surface forms.

The final product of the assignment should be at minimum 3 different surface geometries that have been create using one of each of the above methods.

The results from this assignment are DUE for the morning workshop on April 13, and are required to proceed on to the second assignment 1b).

loft.jpg
birail.jpg


There will be 2 assignment for this course:

Assignment 1 : Skill building
- Maya : Creation of surface modeils and experimentation with different design techniques.
- SurfCAM? : Processing and tooling of the models to be fabricated using the CNC Mill
- Milling : Using the CNC mill to create models and parts from digital files.


Assignment 2 : flow theory & topology
- Preliminary investigation of dynamic forces, parametric programming, and "topological flow".
- Experimentations with different digital design techniques and landscape design ideals.
- Design and fabrication of programmed irregular surfaces.


Diplomwahfacharbeit : DESIGN/FABRICATE/BUILD project
- Programmed
- Parametric
- Fabricated
- Installed on site!

----- Revision r1.10 - 27 Jul 2005 - 12:13 - RussellLoveridge
Copyright © 1999-2003 by the contributing authors. All material on this collaboration platform is the property of the contributing authors.

This website has been archived and is no longer maintained.