Practice - Eclipse for Arduino
Eclipse for Arduino
Arduino IDE is perfect for little programming works, but it would be a tragedy when you are dealing with a large project in such IDE. While the Eclipse is a professional and convenient multi-language IDE with extensible plug-in system, which means you can set up your own Arduino development emvironment by using certain plug-in for Eclipse provided by thirdparty.
Here are some useful links telling you how to setup Eclipse for Arduino:
- Using Eclipse with Arduino Duemilanove
- Arduino Playground - Eclipse
- Eclipse IDE for AVR and Arduino
- Arduino0015+Eclipse problems
- Arduino Notes: Eclipse
- Eclipse helios for Arduino(Chinses only)
Unfortunately, some of the links get little mistakes inside, so if you only follow one of them you can't set up the enviroment correctly. And most of them only tell you what to do without telling you why.
There are also some background information you should know if you want to know why:
To get the Eclipse work with the Arduino you need two things:
- The first one is setting up the Eclipse environment for compiling the program and burning it into the Arduino.
- The second one is the Arduino core library. With that, you can use the functions that Arduino provides like "analogWrite()" and "analogWrite()".
- Usually, we compile the core library into a static library which is a file end with ".a". By including the .a file, we can avoid to include every single .h and .cpp files in the Arduino's core library.
- To compile the library, we also need the ready made Eclipse environment first.
- The third one is optional, If you want to use "Serial.print()" and watch what Arduino has sent to the serial port in Eclipse, you also need to install another plugin called "Target Management (RSE)".
software needed
- Eclipse IDE for C/C++ Developers:
- I'm using the eclipse-cpp-helios-SR2-win32. If you are using the Indigo, the Target Management is already included inside the Eclipse.
- Eclipse AVR plugin:
- a plugin for the Eclipse IDE which adds toolchain support, through CDT, for the gcc compiler for the Atmel AVR series of microcontrollers, and adds a toolbar button to allow quick upload of produced code to a target device.
- WinAVR:
- Some tutorial tells that you can install it any where, but I strongly recommend you to install it into the default directory, otherwise Eclipse might not find it when compiling your program. The 64bit windows with "Program Files (x86)" in the file path might cause the problem, because they can not recognise the "("s.
- Arduino software:
- We will use libraries provided by the Arduino to build the core library and other libraries we need for Eclipse.
- Java Runtime environment:
- You need it everywhere.
- Target Management(optional):
- for serial monitor.
You can find how to install these softwares and plugins on their official websites and other tutorials.
Build the core library step by step
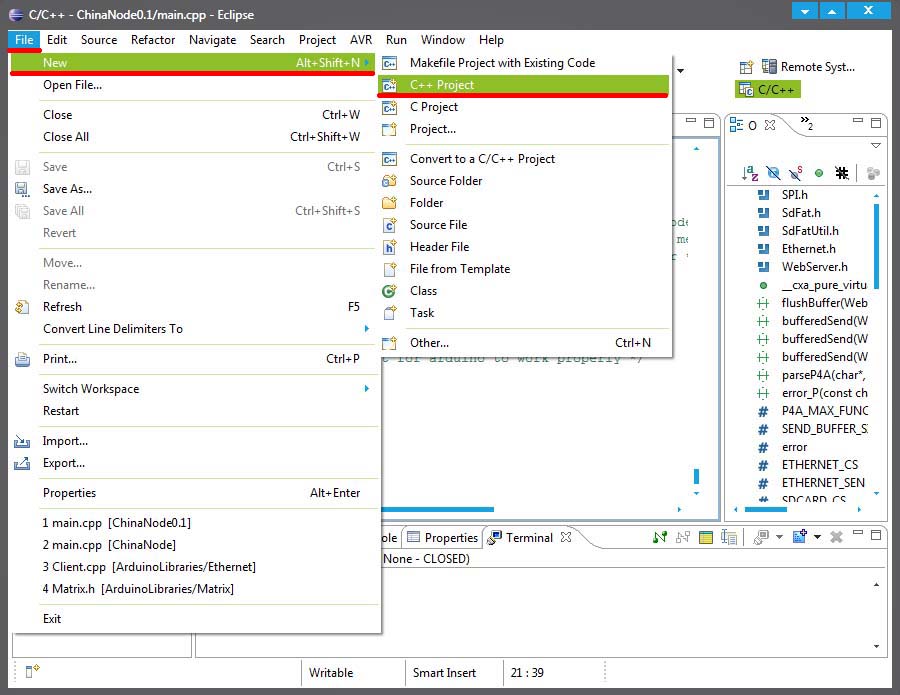
- creat a new C++ project, File -> New -> C++ project
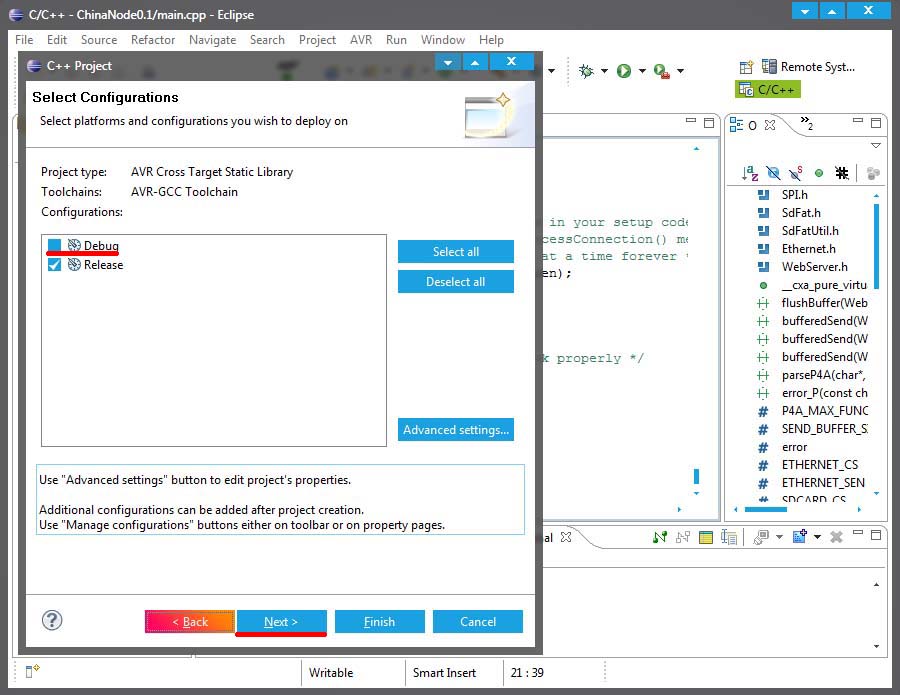
- set it as Static Library project, project name: ArduinoCore, project type: AVR Cross Target Static Library -> Empty project, Toolchains: AVR-GCC toolchain

- unselect the debug
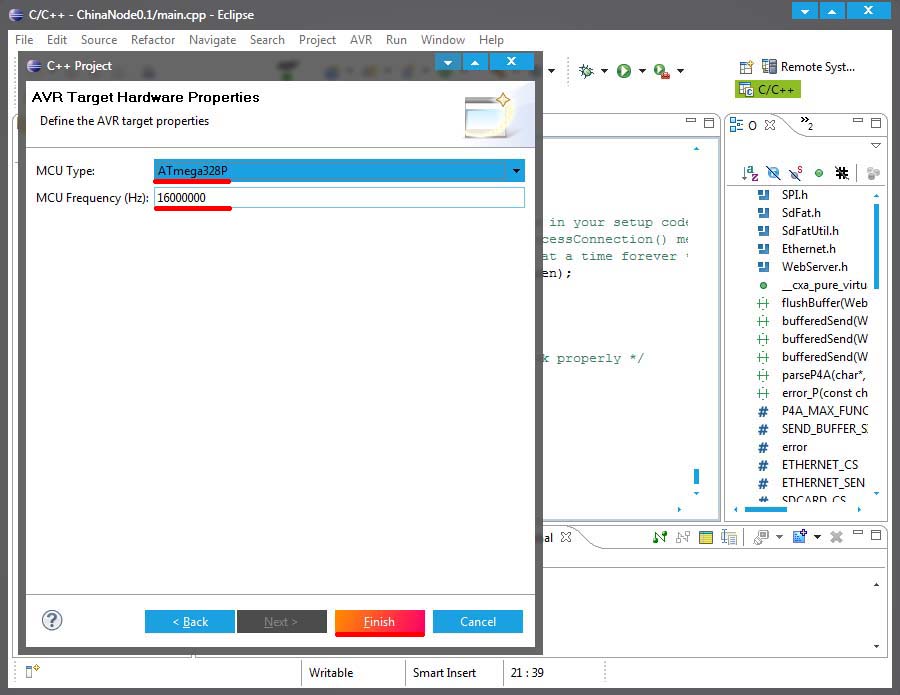
- select the chip type you are using and the frequency
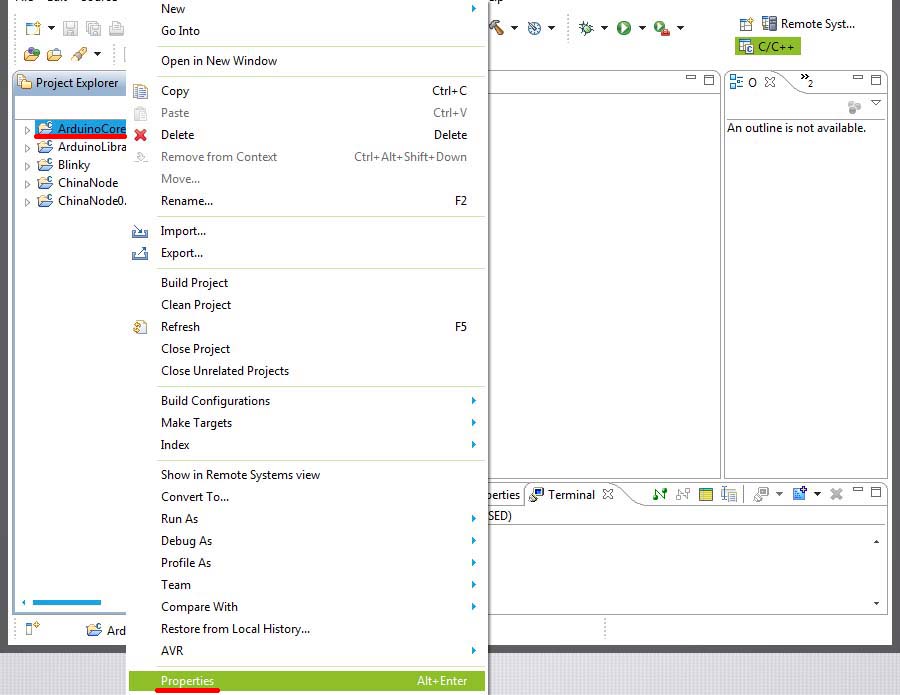
- click finish and you will find the ArduinoCore project in the project explorer, right click on the project floder -> properties
- in the AVR -> Target Hardware, you can change the chip type when you are compiling the library for other, in this case we will keep it as 328p

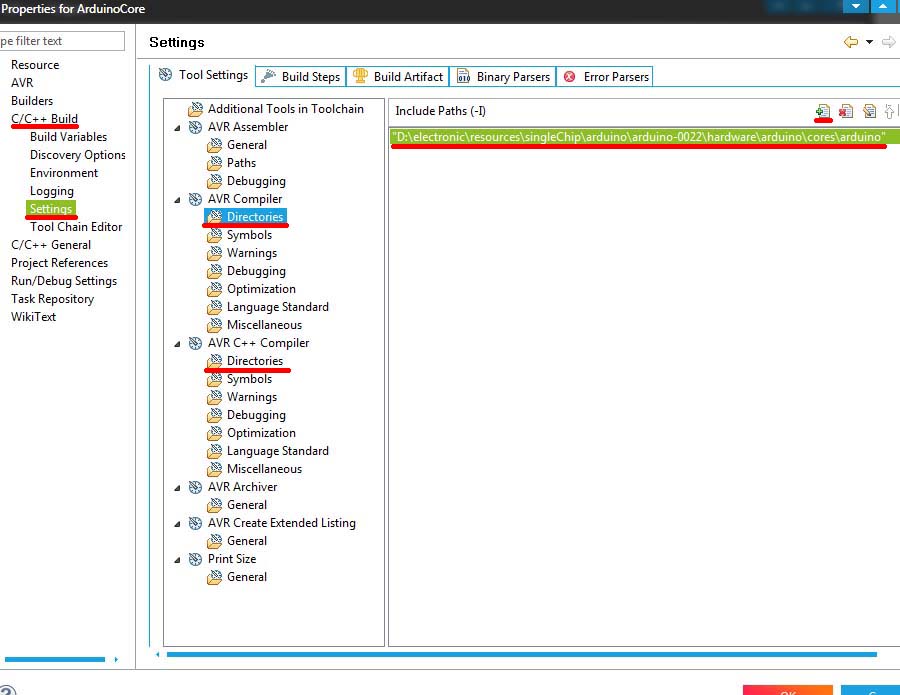
- in C/C++ builder -> settings, add the file path of the Ardunio core files to both of the Driectroies of AVR compiler and AVR C++ compiler. The core folder is in the your Ardunio file folder\hardware\arduino\cores\arduino. when you finish all the settings of properties, don't forget to click the OK at the bottom
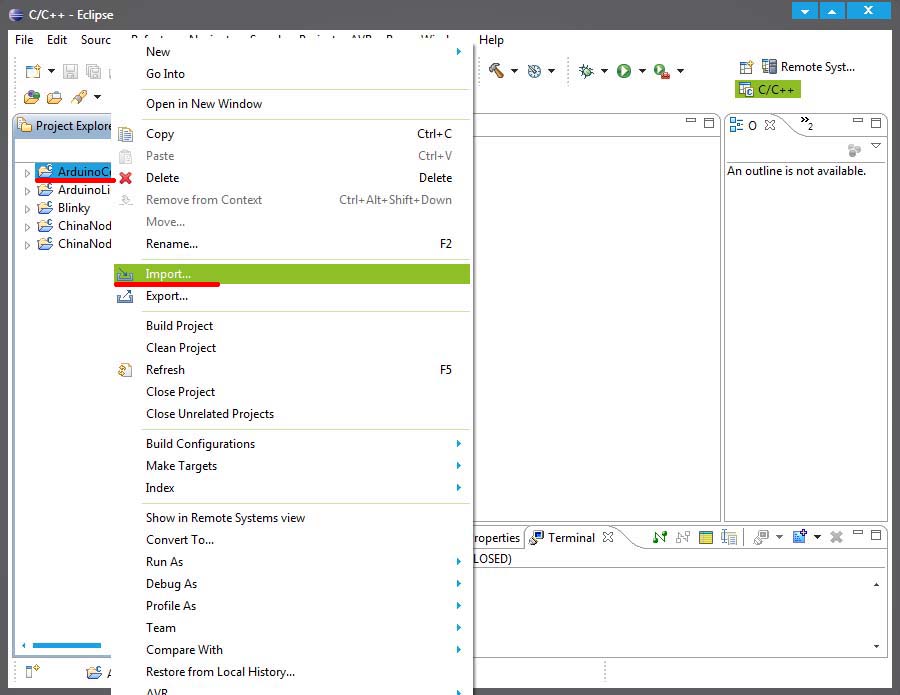
- right click on the project folder again, select import to input the core files
- select filesystem, and next
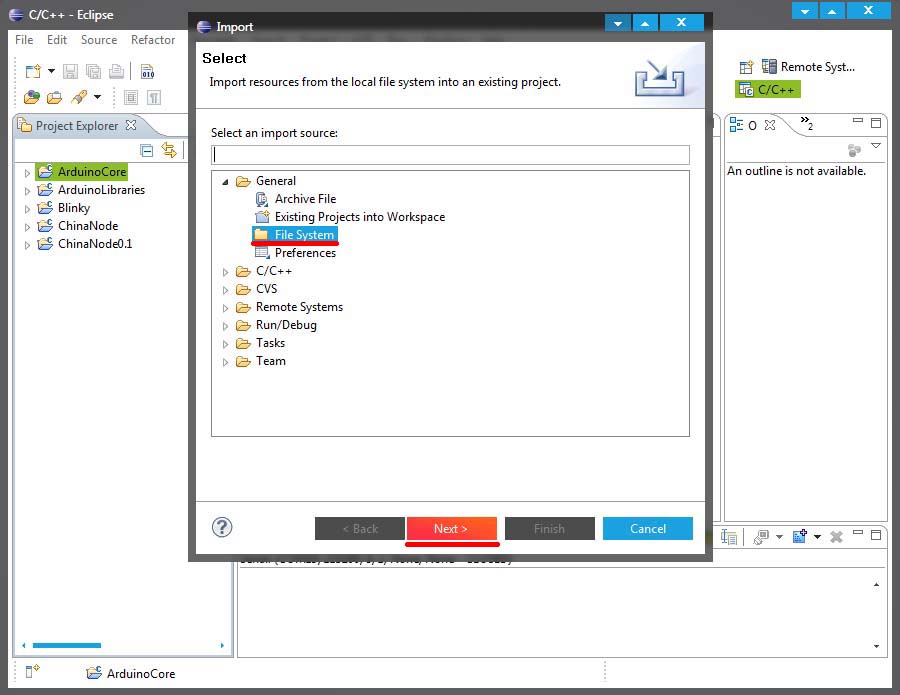
- locate to the Arduino core folder again, select all the files except the main.cpp file, because you will write your own main file in a new project

- you will see the core files have been copied into your porject and the path of the core file of Arduino has also been added into the project

- select Project -> Build All to build the core library, when you doing this make sure the ArduinoCore project is selected

- an Archives and a Release folder will be created after the compiling
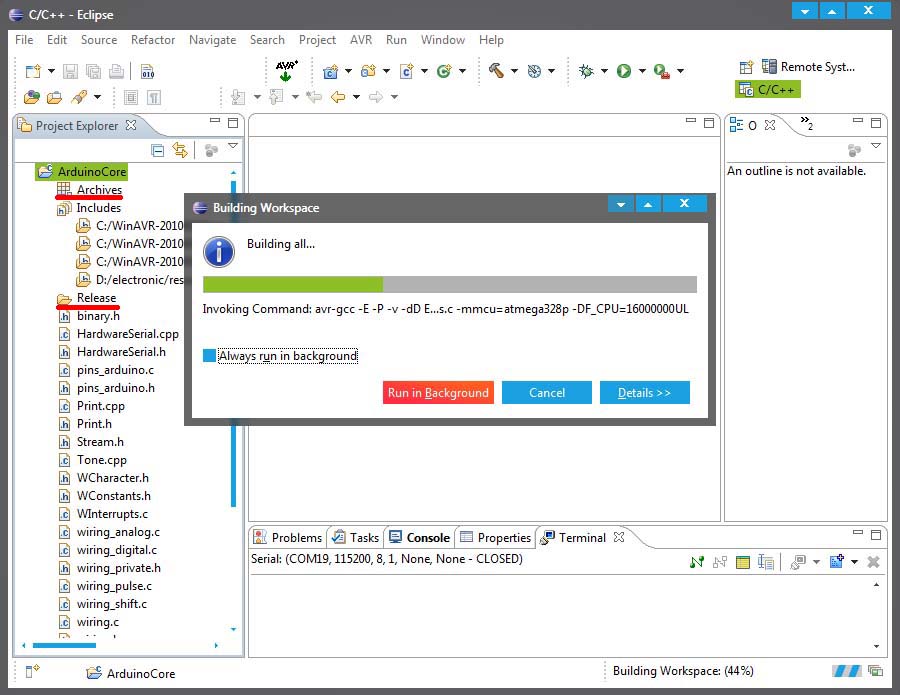
- you can find the .a file both in the Archives and a Release folder
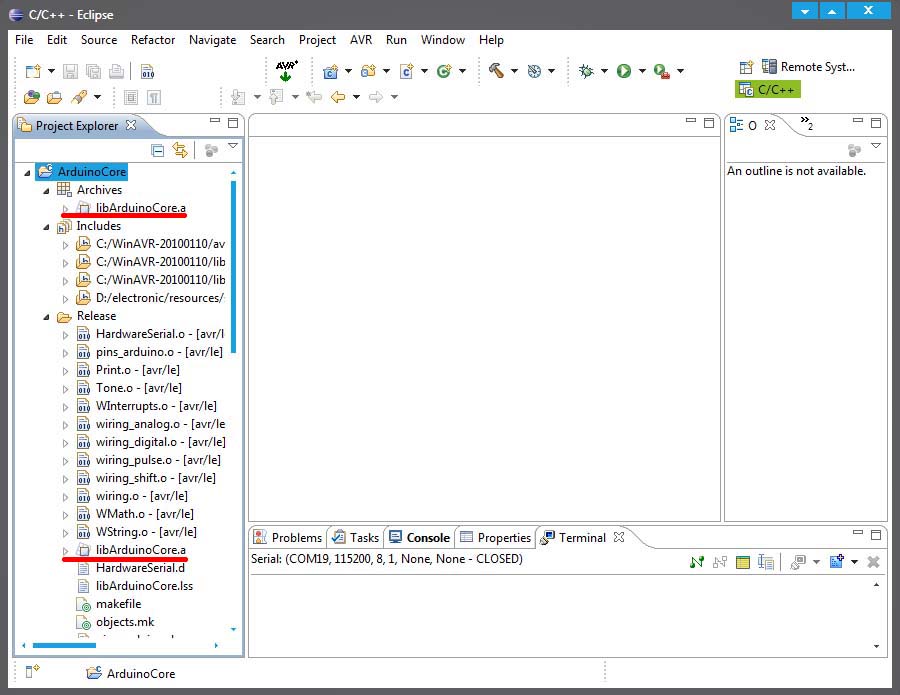
Here, you have finished building the core library of Arduino, And you can use the library by copying and pasting it into other Arduino projects.
Compiling and burning a "Blink" project into the Arduino step by step
There are two main steps, the first is compiling, and the second is uploading the compiled file into the micro controller on Arduino board.
There are olny a little differences between compiling the Arduino project and core library. Here we only list the differet steps.
- creat a new C++ project, File -> New -> C++ project
- set it as Application project, project name: Blinky, project type: AVR Cross Target Application -> Empty project, Toolchains: AVR-GCC toolchain
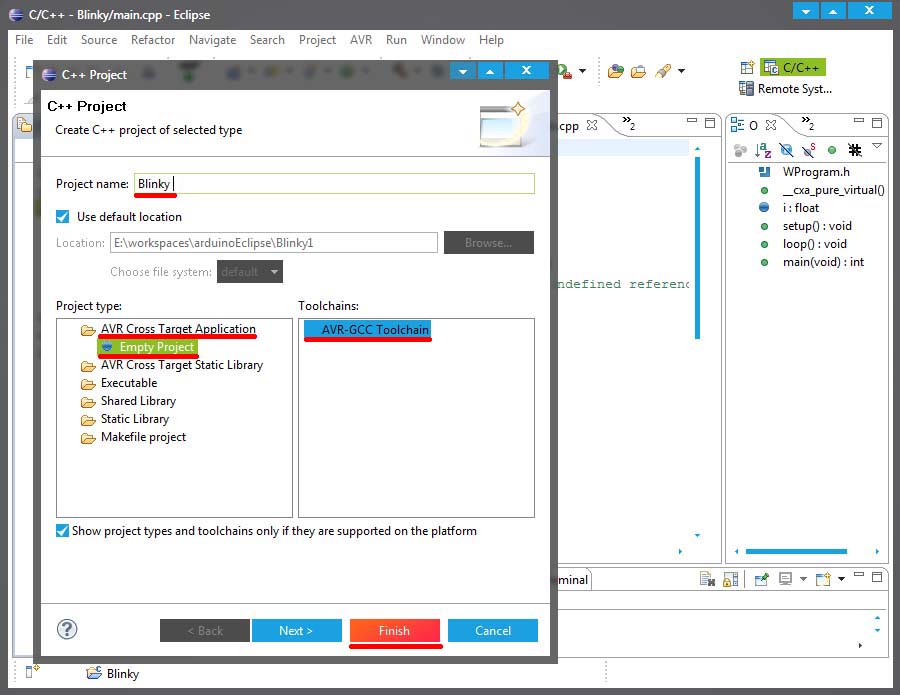
- unselect the debug
- select the chip type you are using and the frequency
- click finish and you will find the Blinky project in the project explorer
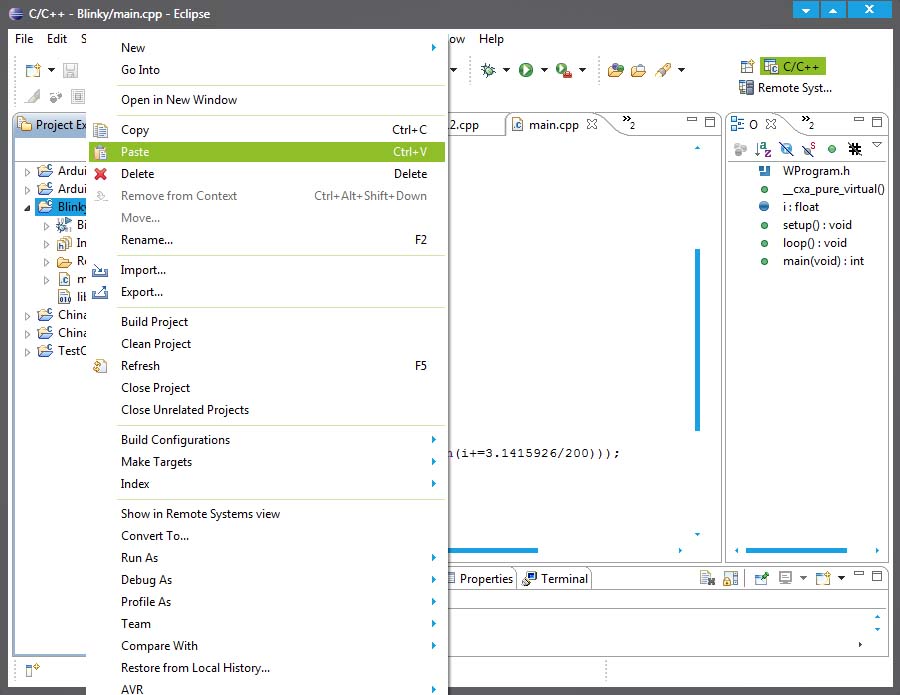
- copy an paste the libArduinoCore.a file from the ArduinoCore project into the Blinky project.
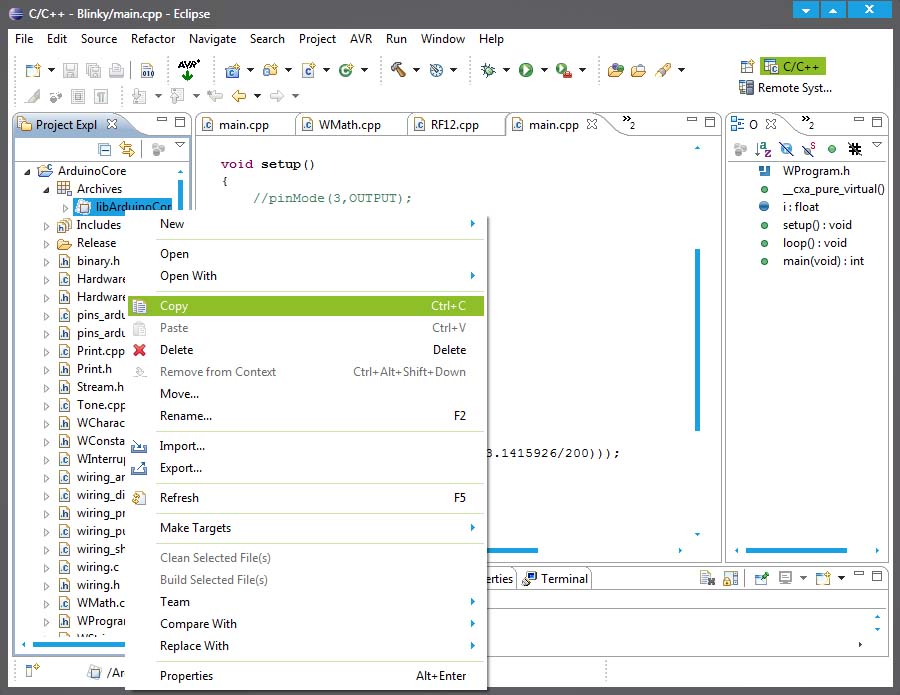 .
.
- right click on the project folder -> properties
- in the AVR -> Target Hardware, you can change the chip type when you are compiling the library for other, in this case we will keep it as 328p
- in C/C++ builder -> settings, add the file path of the Ardunio core files to both of the Driectroies of AVR compiler and AVR C++ compiler. The core folder is in the your Ardunio file folder\hardware\arduino\cores\arduino. when you finish all the settings of properties, don't forget to click the OK at the bottom
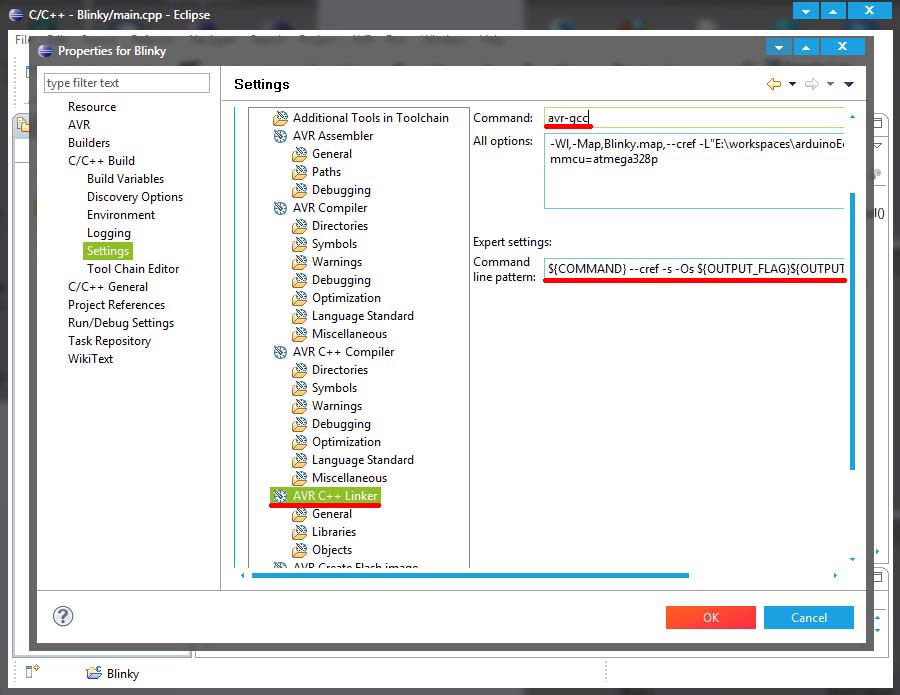
- in C/C++ Linker, set the Command as avr-gcc, and change the Command line pattern to ${COMMAND} --cref -s -Os ${OUTPUT_FLAG}${OUTPUT_PREFIX}${OUTPUT} ${INPUTS} -lm ${FLAGS}.
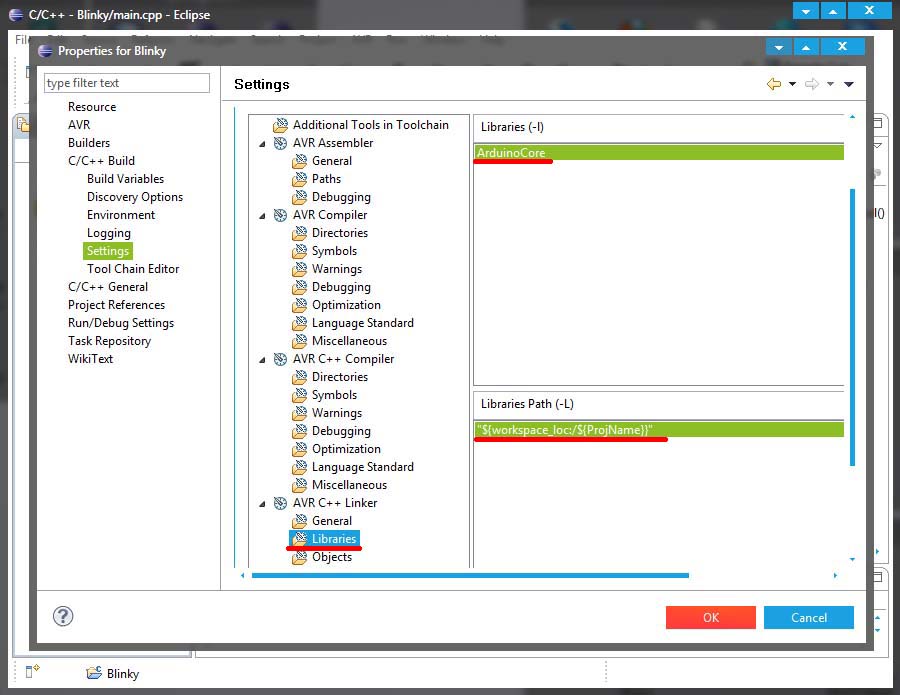
- in C/C++ Linker -> Libraries, add a library name ArduinoCore in the library, and add "${workspace_loc:/${ProjName}}" in the library path which means in the project folder, you can also type in the path of the .a file. Click OK to finish.
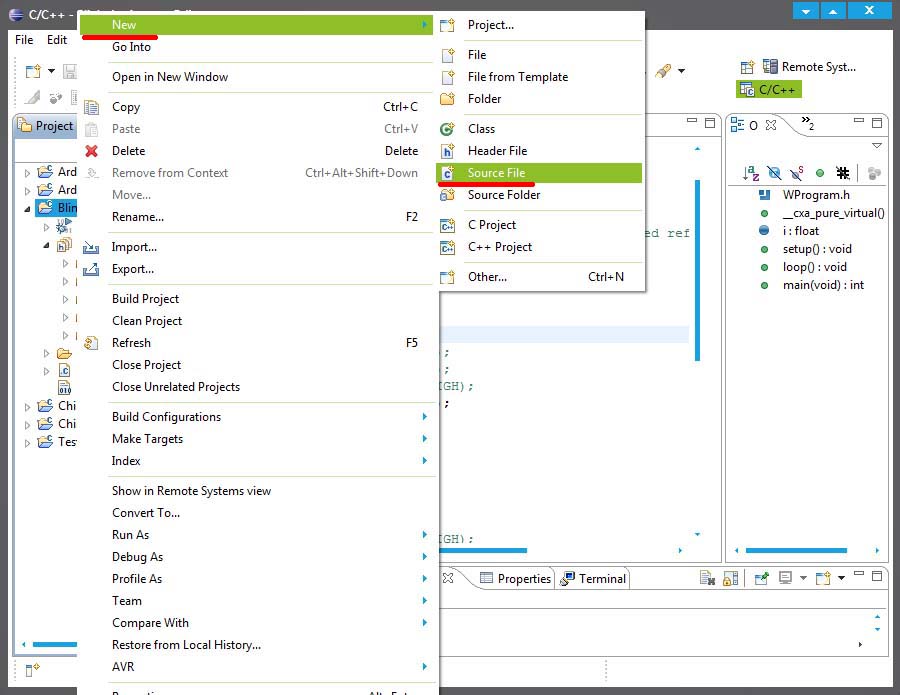
- Then we are going to write the main file. Right click on the Blinky project New -> source file. Set file name as "main.cpp".
- copy the code below into the main.cpp, don't forget to press ctrl + s to save the changes.
=javacode /* Hello World Example: Use of debug/ console */ void setup() { Serial.begin(9600); // Start Serial RS232 Interface with 9600 baud } void loop() { Serial.print("Hello"); // Print into console Serial.print(" "); // Print into console Serial.println("World"); // Println into console delay(500); // Busy wait for 500ms } - Then we are going to setup the environment for uploading the program to Arduino. Right click on the project name again. properties -> AVR -> AVRDude -> programmer -> programmer configuration, press new.
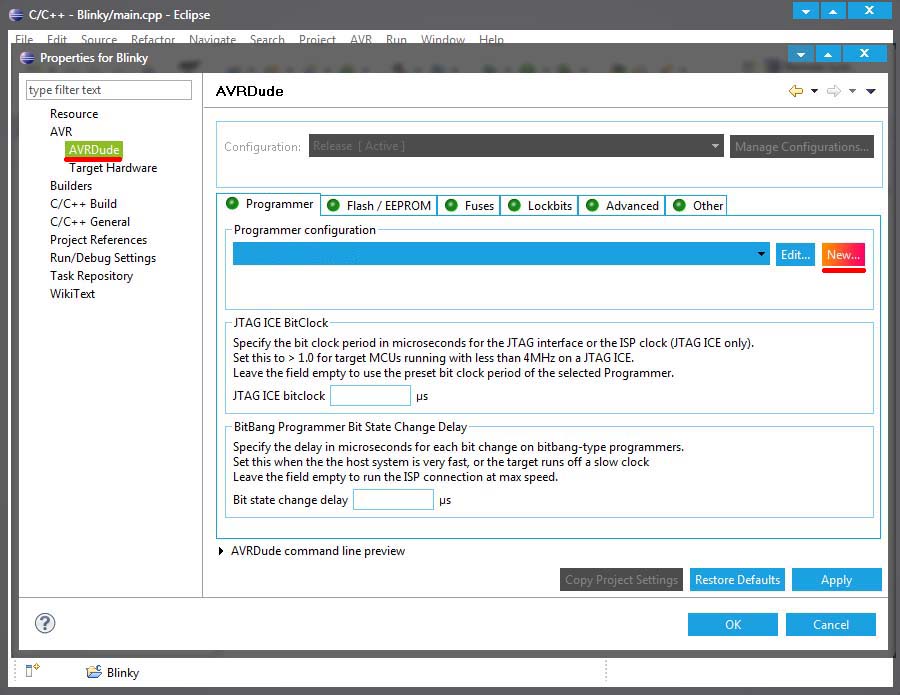
- set any Configuration name you like. In Programmer hardware, choose "Atmel STK500 Version 1.x firmware" for 328P and "Arduino" for Mege1280, type in the name of the port which is connecting to the Arduino board, set the baudrate as 57600. Click OK to finish.Attach:eclipse010_AVRDudeSet.jpg Δ
- press Ctrl + b to compile the file, and the AVR button on the tool bar to upload the programm. If no errors take place, Congratulations!

to be continue...